Baked Chicken Cutlets: A Comprehensive Guide

Introduction to Baked Chicken Cutlets

Selecting the Best Chicken

Choosing the right chicken is the first step to ensuring your baked chicken cutlets turn out flavorful and tender. Opt for chicken breasts that are plump and have a uniform pink color with as little visible fat as possible. Freshness is key, so check the sell-by date to make sure you’re getting the freshest option available. Remember, the quality of your chicken will significantly impact the final taste and texture of your cutlets.

Trimming and Slicing

Once you’ve got your chicken breasts, it’s time to prep them. Start by removing any excess fat with a sharp knife. This not only makes your cutlets healthier but also ensures they cook evenly. To slice, place one hand on top of the breast to steady it, and with your other hand, slice horizontally, creating two thinner slices from one breast. This technique ensures that each piece cooks quickly and evenly, providing the perfect base for your crispy baked chicken.

Tenderizing and Flattening

Tenderizing the chicken helps to break down fibers, making the cutlets more tender and easier to chew. Cover your slices with plastic wrap and gently pound them with a meat mallet or rolling pin. Aim for an even thickness of about ½ inch. This step is crucial for achieving juicy chicken cutlets that cook evenly without drying out.

By following these initial steps, you’re laying the groundwork for delicious, healthy baked chicken that’s bound to impress. Stay tuned as we delve deeper into the art of breading, seasoning, and baking your way to perfection in the next sections.

The Breading Process

Choosing Your Breading Ingredients

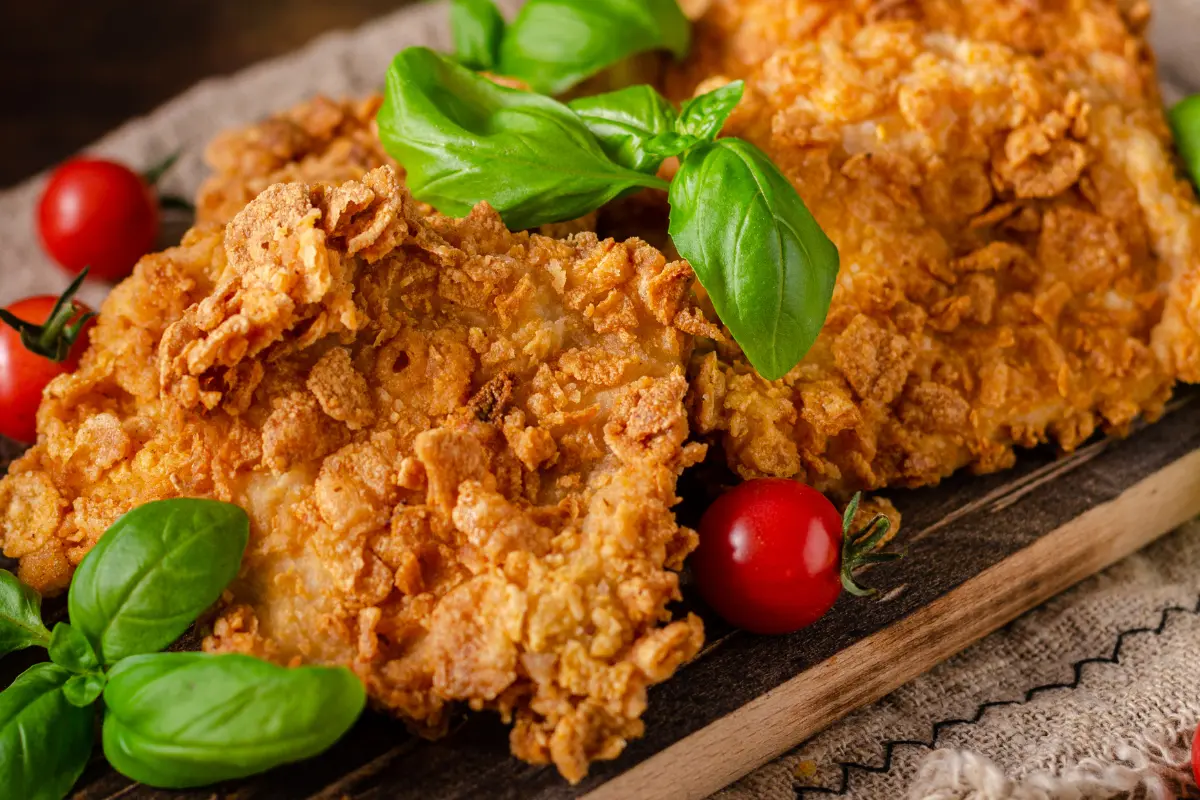
The secret to the perfect crispy baked chicken cutlet lies in the breading. This layer not only adds texture but also flavor. For a classic breading, you’ll need three components: flour, beaten eggs, and breadcrumbs. For those seeking a gluten-free option, almond flour and crushed gluten-free cereal or breadcrumbs can work wonders. Remember, the choice of breading ingredients can make or break your dish, so select them carefully to suit your taste and dietary needs.

The Three-Step Breading Technique

Achieving that golden, crispy exterior starts with the three-step breading technique. This process might seem a tad fiddly at first, but trust me, it’s worth every bit of effort for those crunchy chicken cutlets.

  1. Flouring: Begin by dredging each chicken cutlet in flour. This dry coat helps the egg wash adhere better to the chicken. Shake off any excess flour to avoid clumps. A well-floured cutlet is the foundation of a good breading.
  2. Egg Wash: Next, dip the floured cutlets into a bowl of beaten eggs. The eggs act as a glue between the chicken and the breadcrumbs. Ensure the entire surface is coated, allowing any excess to drip off.
  3. Breading: Finally, press each egg-washed cutlet into your breadcrumbs or breading mix. For an extra layer of flavor, consider adding grated Parmesan cheese, dried herbs, or even a pinch of paprika to your breadcrumbs. Ensure the cutlets are evenly coated, then give them a gentle shake to remove any loose crumbs.

Breading not only adds texture and flavor but also seals in the juices, ensuring your oven-baked chicken breast comes out moist and tender. Once breaded, your cutlets are ready to be baked to golden perfection. As we move forward, we’ll explore the best baking techniques and tips to get that ideal bake, ensuring your breaded chicken cutlets are a hit every time. Stay tuned for more culinary adventures in our next section!

Seasoning and Flavoring

Seasoning Your Cutlets

Before your baked chicken cutlets hit the oven, let’s talk seasoning. Seasoning is more than just salt and pepper; it’s about creating a flavor profile that complements the natural taste of the chicken. For a basic seasoning, combine kosher salt, freshly ground black pepper, garlic powder, and onion powder. This simple blend will enhance the flavor without overpowering the chicken.

For those who like to experiment, the sky’s the limit. Consider adding smoked paprika for a touch of smokiness, or a sprinkle of dried herbs such as oregano, thyme, or basil for a Mediterranean flair. Remember, the seasoning will also flavor the crust, so make it count! For more culinary experiments, check out our adventurous https://recipescreator.com/bang-bang-chicken-skewers-a-flavorful-journey-from-grill-to-plate/ recipe, a flavorful journey from grill to plate.

Creative Flavor Combinations

Creativity in the kitchen leads to delightful discoveries. Why not try a healthy baked chicken with a twist? Mix some grated lemon zest into your breadcrumb mixture for a citrusy punch, or add some finely chopped rosemary for a rustic touch. For an Asian-inspired twist, a dash of five-spice powder can add an exotic flavor.

Marinating your cutlets before breading adds depth and juiciness. A simple marinade of olive oil, lemon juice, garlic, and herbs can transform your baked chicken cutlets into something extraordinary. Just remember to pat the chicken dry before starting the breading process to ensure the coating sticks properly.

Seasoning and flavoring are where you can let your culinary creativity shine. It’s all about building layers of flavor that complement each other, turning simple baked chicken cutlets into a dish that’s bursting with taste. Next, we’ll delve into the best practices for baking your cutlets, ensuring they emerge from the oven crispy on the outside and succulent on the inside.

Baking Techniques and Tips

Optimal Baking Temperature and Time

Finding the right baking temperature and time is crucial for achieving crispy baked chicken that’s still juicy on the inside. The sweet spot for baking chicken cutlets is around 400°F (205°C). At this temperature, the breading gets crispy and golden without overcooking the delicate chicken inside. As for timing, it usually takes about 20-25 minutes, depending on the thickness of your cutlets. Always use a meat thermometer to ensure the chicken reaches the safe internal temperature of 165°F (74°C). If you’ve ever encountered odd textures in your chicken, which can be quite perplexing, Food52 offers insights and discussions on Odd Chicken Texture, providing a platform for culinary enthusiasts to share their experiences and solutions.

Using a Wire Rack for Even Cooking

A simple yet effective trick to ensure your baked chicken cutlets cook evenly and get crispy on all sides is to bake them on a wire rack placed over a baking sheet. This setup allows hot air to circulate around the chicken, ensuring it cooks evenly and the breading doesn’t get soggy from sitting in its own juices. Plus, it spares you the hassle of flipping the cutlets midway through baking.

By adhering to these baking techniques and tips, you can say goodbye to the days of dry, bland chicken. Instead, you’ll enjoy juicy chicken cutlets with a perfectly crisp crust every time. Remember, baking is both an art and a science. Don’t be afraid to experiment with different temperatures and cooking times to find what works best for your oven.

In the next section, we’ll explore serving and pairing suggestions to transform your delicious baked chicken cutlets into a complete, mouthwatering meal. Whether you’re serving a simple family dinner or entertaining guests, these tips will help you present your chicken cutlets in style.

Serving and Pairing Suggestions

Accompaniment and Side Dishes

Once you’ve mastered the art of creating the perfect baked chicken cutlets, the next step is to pair them with the right accompaniments to turn a simple dish into a feast. For a light, healthful meal, consider a vibrant, crisp salad with a variety of greens, cherry tomatoes, and a light vinaigrette. If you’re looking for something heartier, roasted vegetables like asparagus, brussels sprouts, or sweet potatoes not only complement the chicken’s flavor but also add a splash of color to your plate.

For a more traditional route, a side of creamy mashed potatoes or a warm pasta salad can be comforting and satisfying. Quinoa or a wild rice blend also makes for a nutritious, fiber-rich side that pairs beautifully with the healthy baked chicken.

Presentation Tips

The presentation is just as important as the taste when it comes to serving your baked chicken cutlets. After all, we eat with our eyes first! Garnish your chicken with a sprinkle of freshly chopped herbs like parsley or basil for a pop of color and freshness right before serving. A drizzle of lemon juice not only adds a bright, acidic contrast to the crispy, savory chicken but also enhances its flavors.

For a visually appealing plate, consider the balance of colors and textures. Place your crispy baked chicken alongside a side dish that complements its colors, and don’t forget a simple garnish to elevate the dish’s appearance. A well-thought-out presentation can turn a simple meal into a special one, making your dining experience even more enjoyable.

With these serving and pairing suggestions, you’re now equipped to serve your baked chicken cutlets in style, ensuring a delightful meal that’s as pleasing to the eye as it is to the palate. Stay tuned for our next section, where we’ll delve into frequently asked questions to help you perfect your baked chicken cutlets and explore variations to keep your meals exciting.

FAQs

Frequently Asked Questions

When it comes to perfecting baked chicken cutlets, several common questions often arise. Let’s tackle some of these head-on to ensure your culinary journey is as smooth as can be.

Preparation and Breading
  • Can I make these cutlets ahead of time?
    Absolutely! You can bread the chicken cutlets and store them in the refrigerator for a few hours before baking. Just make sure to cover them lightly with plastic wrap. For longer storage, freeze them on a baking sheet and then transfer to a freezer bag once solid. Bake directly from frozen, adding a few extra minutes to the cooking time.
  • How do I prevent the breading from falling off?
    To keep your baked chicken cutlets crispy, press the breadcrumbs onto the chicken firmly after dipping in the egg wash. Letting them rest for about 10 minutes before baking helps the coating adhere better.
Baking and Serving
  • What if I don’t have a wire rack for baking?
    If you don’t have a wire rack, flip the cutlets halfway through the baking time. This method ensures both sides crisp up nicely, though be gentle to keep the breading intact.
  • Are there any dipping sauce recommendations?
    Sauces can elevate your chicken cutlets to new heights. Whether it’s a classic marinara, tangy honey mustard, creamy avocado cilantro lime sauce, or spicy chipotle aioli, the right sauce can add a flavorful touch.
Storing and Reheating
  • How do I store and reheat leftovers?
    Store leftover baked chicken cutlets in an airtight container in the refrigerator and enjoy within a few days. For reheating, warm them in a 350°F (175°C) oven for about 10 minutes until they’re crispy again. Avoid the microwave to prevent soggy breading.

By addressing these FAQs, you’re now well-equipped to navigate the nuances of making delicious, juicy chicken cutlets. These tips and insights will help you enjoy your culinary creations to the fullest, ensuring each bite is as satisfying as the last.

🍗 Crispy Baked Chicken Cutlets 🍗

Dive into the world of culinary delights with this simple yet utterly delicious recipe for Crispy Baked Chicken Cutlets. Perfect for a weeknight dinner or a casual gathering, these cutlets promise a golden, crunchy exterior enveloping tender, juicy chicken. Let’s embark on this gastronomic journey, ensuring your dish turns out to be the talk of the table. Follow these detailed instructions for a meal that’s sure to impress.

📋 Ingredients:

  • 4 boneless, skinless chicken breasts
  • 1 cup breadcrumbs
  • 1/4 cup grated Parmesan cheese
  • 1 tsp garlic powder
  • 1 tsp paprika
  • 1/2 tsp salt
  • 1/4 tsp black pepper
  • 2 large eggs, beaten
  • Cooking spray or olive oil

📝 Instructions:

1️⃣ Preparing Your Oven and Baking Sheet

Begin by preheating your oven to 400°F (200°C). Take a baking sheet and line it with parchment paper for a non-stick surface, then lightly grease it with cooking spray or a drizzle of olive oil. This preparation ensures your chicken cutlets bake to perfection without sticking.

2️⃣ Even Thickness for Even Cooking

Place your chicken breasts between two sheets of plastic wrap. With a gentle touch, pound them to an even thickness of about 1/2 inch. This crucial step guarantees that each cutlet cooks uniformly, preventing any dry or undercooked areas.

3️⃣ Crafting the Perfect Coating

In a shallow dish, whisk together the breadcrumbs, grated Parmesan cheese, garlic powder, paprika, salt, and black pepper. This blend not only adds a robust flavor but also ensures your cutlets have that irresistible crispy finish.

4️⃣ The Egg Wash

Beat two large eggs in another shallow dish. This will act as the glue, helping your breadcrumb mixture adhere to each chicken breast, ensuring a crisp, even coating.

5️⃣ Coating Your Cutlets

Dip each chicken breast first into the beaten eggs, then into the breadcrumb mixture. Press the breadcrumbs gently onto the chicken to make sure the coating sticks well. This step is pivotal in achieving that golden, crunchy exterior.

6️⃣ Ready for Baking

Place the coated chicken breasts on your prepared baking sheet. For an extra touch of golden goodness, lightly spray the tops with cooking spray or give them a quick drizzle with olive oil.

7️⃣ Baking to Perfection

Bake in the preheated oven for 20-25 minutes, or until the chicken is beautifully golden brown and cooked through, reaching an internal temperature of 165°F (75°C). This precise cooking ensures your chicken cutlets are safe to eat and deliciously juicy.

8️⃣ The Final Touch

Remove your crispy cutlets from the oven and let them rest for a few minutes. This brief pause allows the juices to redistribute, ensuring each bite is as flavorful as the last.

💡 Notes:

  • Serving Suggestions: These crispy chicken cutlets pair wonderfully with your favorite dipping sauce or a fresh salad, making for a balanced and satisfying meal.
  • Storage Tips: Leftover cutlets can be stored in an airtight container in the refrigerator for up to 3 days, ensuring your efforts can be enjoyed beyond just one meal.

Prep Time: 10 minutes

Cook Time: 20-25 minutes

Total Time: 30-35 minutes

Servings: 4

Embark on this culinary adventure and bring a touch of gourmet to your everyday meals with these Crispy Baked Chicken Cutlets. Whether you’re a seasoned chef or a budding cook, this recipe promises delicious results that will elevate your dining experience. Enjoy the process and the delicious outcome!


Leave a Comment