Homemade Hot Sauce: Your DIY Spice Guide

A bottle of homemade hot sauce surrounded by fresh chili peppers and spices.

Introduction to Homemade Hot Sauce: Your DIY Spice Guide Welcome to the fiery world of homemade hot sauce, where every drop promises a burst of flavor and a kick of heat to elevate your culinary creations. Whether you’re a seasoned spice aficionado or a curious newcomer ready to explore the art of DIY condiments, this … Read more

Peppermint Patties: Origins, Health Benefits & Culinary Versatility

Peppermint Pattie with a minty center and dark chocolate coating on a white background

Peppermint Patties: A Minty Delight Reimagined Peppermint Patties, with their irresistible blend of minty freshness and creamy chocolate richness, have won the hearts and taste buds of people worldwide. In this article, we embark on a journey to rediscover Peppermint Patties, exploring their origins, culinary versatility, health benefits, and much more, all while optimizing for … Read more

Watermelon Cake Recipe: Refreshing & Healthy Dessert

Refreshing watermelon cake topped with whipped cream and assorted fresh berries, ideal for a healthy summer dessert.

Delving Into the Dessert Realm with Watermelon Cake The watermelon cake stands out as a unique dessert option. Far from ordinary, this innovative creation blends the refreshing taste of watermelon with the art of cake decoration. Covering everything from ingredient selection to presentation, this guide is perfect for baking enthusiasts and novices alike, promising an … Read more

Cake Decorating Techniques

Cake decorating tools and ingredients on a kitchen counter

In the enchanting world of cake decorating, the journey from a simple batter to an artful confection is nothing short of magical. The alchemy of baking meets the finesse of artistry, transforming humble ingredients into masterpieces that delight both the palate and the eyes. This narrative delves deep into achieving the perfect frosting consistency, a … Read more

Ultimate Guide to Perfect Banana Bread: Tips, Tricks, and FAQs

Delicious homemade banana bread fresh out of the oven.

Introduction to Banana Bread Banana bread, a timeless classic, offers warmth and comfort with every bite. Its rich history and simple ingredients make it a favorite among bakers of all levels. Choosing the Right Ingredients Every great banana bread starts with the right ingredients. From the ripeness of the bananas to the type of flour … Read more

Banana Pudding Cheesecake Squares

A close-up image of Banana Pudding Cheesecake Squares topped with whipped cream and banana slices

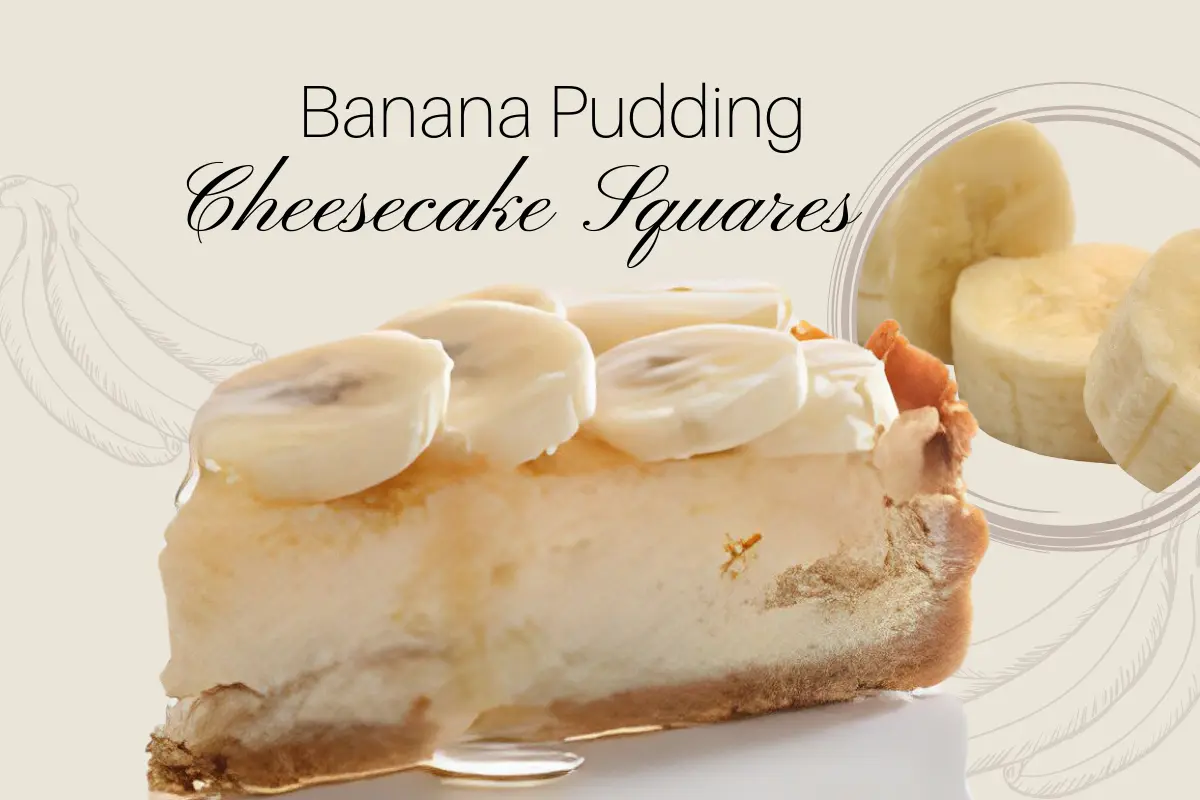
Indulge in the ultimate dessert experience with Banana Pudding Cheesecake Squares, where the creamy delight of cheesecake meets the comforting sweetness of banana pudding. This guide will walk you through creating this irresistible treat, promising a dessert that’s as delightful to look at as it is to eat.

Introduction

Banana Pudding Cheesecake Squares combine the best of two worlds: the rich, creamy texture of cheesecake and the light, comforting taste of banana pudding. This dessert is not just a treat for your taste buds but also a feast for the eyes, making it the perfect addition to any dinner table or party dessert spread.

Crafting the Perfect Dessert

Starting with the Base: The Crust

Firstly, let’s dive into the initial step of crafting a solid and flavorful foundation for your Banana Pudding Cheesecake Squares. To achieve the perfect crunch, it’s essential to focus on the quality of the graham crackers used. Moreover, the crust-to-butter ratio plays a significant role in ensuring the base is neither too dry nor too greasy.

Starting with the Base: The Crust

Master Tip: Achieving the Perfect Crunch – A pro baker’s insight into getting that irresistibly crisp crust every time, including the best type of graham crackers to use and the optimal crust-to-butter ratio.

The Filling

  • Creamy Cheesecake Layer: At the heart of the dessert is a smooth filling made from quality cream cheese, blended with sugar, eggs, and mashed bananas for that unmistakable flavor.
The Heart of the Dessert: Cheesecake Filling

Master Technique: Silky Smooth Filling – Learn from seasoned chefs how to ensure your cheesecake layer is free from lumps and cracks, including the importance of ingredient temperatures and mixing techniques.

The Topping

  • Whipped Cream and Garnish: The dessert is crowned with a fluffy layer of whipped cream, garnished with vanilla wafers and fresh banana slices for an appealing finish.

Expert Tips for Perfection

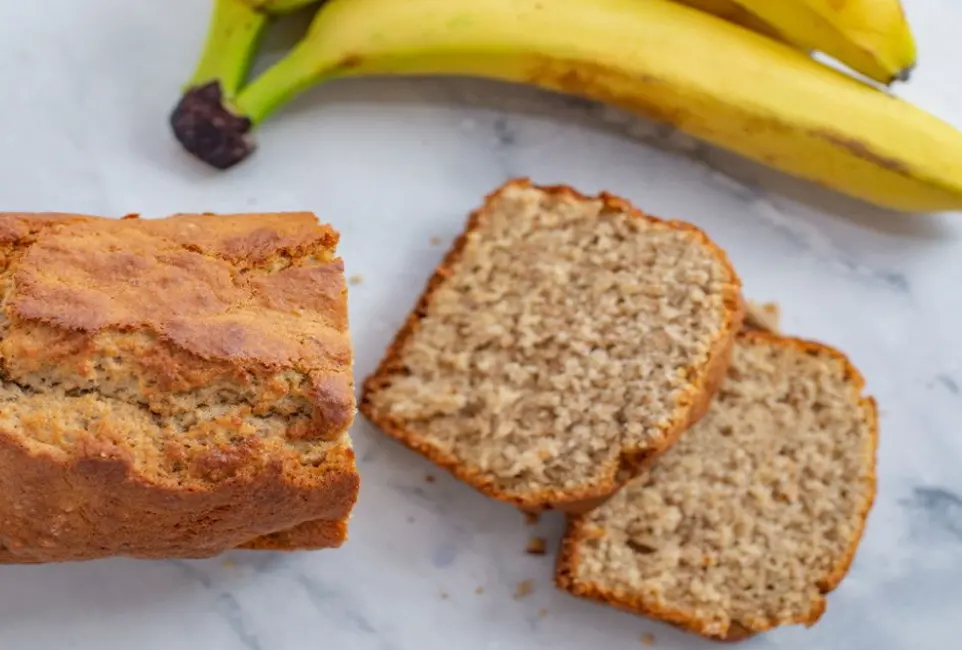
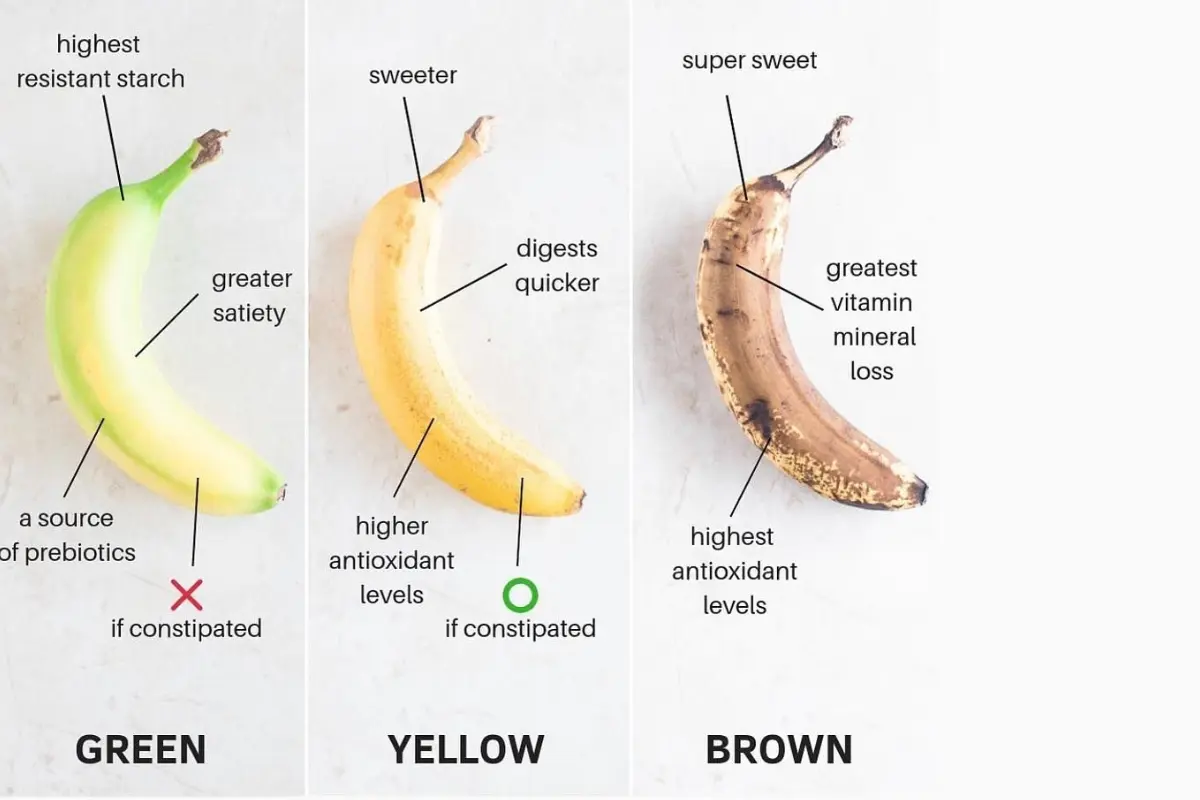
  • Selecting Bananas: Choose bananas that are ripe yet firm to ensure the perfect texture and sweetness.
  • Cheesecake Consistency: Ensure your cream cheese is at room temperature to achieve a smooth, lump-free filling.

FAQs

  • Preventing Cracks: Bake your cheesecake layer in a water bath to avoid cracks and ensure even cooking. Learn more about this technique from this helpful resource.
  • Make-Ahead Tips: This dessert can be prepared up to 2 days in advance, with banana slices and wafers added just before serving. For more make-ahead dessert ideas, check out Epicurious.

Conclusion

Banana Pudding Cheesecake Squares offer a delightful blend of flavors and textures, making them a must-try for any dessert lover. By following this guide, you’re sure to create a dessert that will impress and satisfy your guests.

Enjoy creating this delicious treat, and may your dessert spread be as joyful and satisfying as the process of making these wonderful squares!

Navigating the Layers: A Deep Dive into Banana Pudding Cheesecake Squares

Creating the perfect Banana Pudding Cheesecake Squares requires a blend of precision, patience, and a touch of culinary creativity. Each layer contributes its unique texture and flavor, culminating in a dessert that’s both sophisticated and comforting.

Adding the Signature Touch: Banana Pudding Layer

Furthermore, the banana pudding layer adds a classic touch that distinguishes this dessert. Achieving the perfect consistency and flavor balance is vital, and selecting the right type of bananas can make all the difference. Consequently, this layer contributes a delightful contrast to the creamy cheesecake filling.

The Graham Cracker Crust

  • Foundation: The crust acts as the sturdy base, its buttery crunch contrasting beautifully with the layers above.
  • Preparation: Combine finely crushed graham crackers with melted butter and sugar, pressing the mixture firmly into your pan.

The Heart of the Dessert: Cheesecake Filling

Next, we move on to the creamy, dreamy world of cheesecake filling. To ensure a smooth, rich consistency, it’s crucial to mix the ingredients just right. Additionally, incorporating the banana flavor subtly is key to tying the dessert together, enhancing the overall taste without overpowering the cheesecake essence.

The Pudding and Topping

  • Banana Pudding Layer: This layer introduces a custard-like texture, with vanilla pudding mix and sliced bananas offering a classic pudding feel.
  • Whipped Cream Garnish: A light, fluffy whipped cream topping, adorned with vanilla wafers and fresh banana slices, adds the final touch of elegance.
The Final Flourish: Topping and Garnish

Garnishing like a Pro – Expert advice on decorative touches that enhance both the flavor and appearance of your dessert, including how to whip cream to the perfect stiffness and arrange garnishes for visual appeal.

Ensuring Perfection: Pro Tips and Tricks

  • Banana Ripeness: The ripeness of your bananas can greatly affect the dessert’s flavor and texture. Opt for bananas that are ripe but not overly mushy.
  • Smooth Cheesecake: Achieve a velvety cheesecake texture by allowing your cream cheese to reach room temperature before mixing.

Serving and Enjoyment

  • Presentation: Serve your Banana Pudding Cheesecake Squares chilled, using a hot knife cleaned between slices for smooth cuts.
  • Storage: Keep leftovers refrigerated, and covered to maintain freshness for up to 3 days. For tips on storing cheesecakes, visit Food52.

In Summary

The journey to creating the ultimate Banana Pudding Cheesecake Squares is one of balance, blending the comforting familiarity of banana pudding with the indulgent creaminess of cheesecake. By following these steps and tips, you’ll craft a dessert that’s as delightful to present as it is to savor.

Embrace the process, and enjoy the delicious rewards of your culinary efforts. Here’s to creating moments of joy, one square at a time!

Here we go, jump into the world of recipes, enjoy your time and we wish you a wonderful time preparing your favorite recipes.

🍌 Banana Pudding Cheesecake Squares 🍰

📋 Ingredients:
– 1 1/2 cups graham cracker crumbs
– 1/4 cup granulated sugar
– 6 tbsp unsalted butter, melted
– 16 oz cream cheese, softened
– 3/4 cup granulated sugar
– 2 large eggs
– 2 ripe bananas, mashed
– 1/4 cup sour cream
– 1 tsp vanilla extract
– 1/4 cup all-purpose flour
– 1/2 cup banana pudding mix
– Whipped cream and sliced bananas for garnish

📝 Instructions:
1️⃣ Preheat the oven to 325°F (165°C). Line a 9×9-inch baking pan with parchment paper, leaving an overhang on the sides.
2️⃣ In a medium bowl, mix the graham cracker crumbs, sugar, and melted butter until combined. Press the mixture evenly into the bottom of the prepared pan.
3️⃣ In a large bowl, beat the cream cheese and sugar until smooth. Add the eggs, one at a time, mixing well after each addition.
4️⃣ Stir in the mashed bananas, sour cream, and vanilla extract until smooth.
5️⃣ Gradually add the flour and banana pudding mix, mixing until just combined.
6️⃣ Pour the batter over the graham cracker crust and spread it evenly.
7️⃣ Bake in the preheated oven for 40-45 minutes, or until the edges are set and the center is slightly jiggly.
8️⃣ Remove from the oven and let cool completely at room temperature. Refrigerate for at least 4 hours or overnight until fully chilled.
9️⃣ Once chilled, lift the cheesecake out of the pan using the parchment paper overhang. Cut into squares and garnish with whipped cream and sliced bananas before serving.

Notes 💡:
– Make sure the cream cheese is at room temperature to ensure a smooth and creamy cheesecake texture.
– You can use store-bought or homemade banana pudding mix for this recipe.
– Feel free to customize the garnishes with chopped nuts, chocolate shavings, or caramel sauce.

#bananapudding #cheesecake #dessert #bananacheesecake #easyrecipe #homemade #sweettreat #dessertbars #foodphotography #yum

Dessert Shells: Creative Recipes & Expert Baking Tips …

Various dessert shells displayed on a white platter, ready to be filled with delicious treats

Meta Description: Explore the delightful world of dessert shells, where creativity meets simplicity. Uncover crafting secrets, indulge in mouth-watering recipes, and elevate your baking with expert tips. Let’s embark on a sweet journey with dessert shells, promising unique and delicious treats.

Introduction to Dessert Shells

Ah, dessert shells, the unsung heroes of the pastry world! More than just a treat, they’re a canvas for culinary creativity, blending tradition with innovation. Let’s take a stroll through their rich history and explore the variety they bring to the table.

A Brief Stroll Through History

The journey of dessert shells dates back to when our ancestors used their ingenuity to create edible containers for their fruits and creams. Today, we have an array of options, from crispy tartlets to soft sponge cups, each with its own story to tell.

The Many Faces of Dessert Shells

From the buttery flakiness of pastry cups to the dreamy chocolate shells and the light, airy meringue shells, there’s a dessert shell for every occasion and filling. Each type brings its own charm and ideal use, making your dessert spread as unique as it is delicious.

Diving into the Sweet and Versatile World of Dessert Shells

In this exploration, we’ll dive deep into the world of dessert shells, uncovering the secrets to crafting these edible wonders. From the flaky tenderness of pastry cups to the rich decadence of chocolate bowls, we’ll share recipes, tips, and answer your burning questions about these confectionery marvels.

Types and Recipes

The Spectrum of Dessert Shells

  • Variety spices up the world of dessert shells, with each type adding a special touch to our sweet concoctions. Let’s delve into the classic choices, the love of cocoa, and the lightness of air, each bringing something unique to the dessert table.

Pastry Shells: A Classic Choice

  • Think of pastry shells as the versatile foundation of your dessert repertoire, suitable for any occasion and filling. Their delightful crunch contrasts beautifully with soft fillings, making them a classic choice for bakers.

Chocolate Shells: For the Love of Cocoa

  • For chocolate lovers, chocolate shells are a dream come true. These edible containers turn any filling into an indulgent experience, showcasing the blissful marriage of chocolate with fruits, creams, or mousses.

Meringue Shells: Light as Air

  • Meringue shells add a whimsical touch to your desserts, perfect for lighter fillings. Their delicate texture and dreamy appearance make them a favorite for those looking to add a touch of elegance to their dessert spread.

Recipes to Get You Started

  • From dessert shells with macerated mixed berries to gluten-free options and elegant mini tartlet shells, we’ll share recipes to kickstart your adventure in the world of dessert shells. Whether you’re a seasoned baker or a newcomer, there’s a recipe here with your name on it.

Advanced Techniques and Tips for Perfecting Pastry Cups

Elevating Your Dessert Shells

With the basics under your belt, let’s explore advanced techniques and tips to make your dessert shells stand out. From decoration and presentation to storage and serving suggestions, we’ll cover everything you need to elevate your dessert game.

Decoration and Presentation: The Finishing Touches

  • First impressions are crucial in the dessert world. Learn how to add those finishing touches that make your desserts not just tasty but also a feast for the eyes.

Storage and Make-Ahead Tips: Keeping It Fresh

  • Discover the secrets to keeping your dessert shells fresh and crisp, allowing you to prepare in advance and save time without sacrificing quality.

Serving and Pairing: The Art of Combinations

  • Uncover the art of serving and pairing dessert shells, from casual DIY bars to elegant pre-assembled presentations, complemented by the perfect non-alcoholic beverages.

FAQs: Your Questions Answered

Conclusion

As we wrap up our journey through the world of dessert shells, remember that each shell is a promise of a dessert as unique as it is delicious. Armed with these tips, recipes, and techniques, you’re well-equipped to unleash your culinary creativity and impress with your confectionery marvels.

Advanced Techniques and Tips for Perfecting Pastry Cups (Cont’d)

Elevating your dessert shells from great to extraordinary requires a blend of creativity, precision, and a dash of whimsy. Beyond the basics, mastering advanced techniques can transform your desserts into works of art that taste as incredible as they look.

Finishing Touches That Wow

  • The final touches on your dessert shells can turn them into the stars of the show. Whether it’s a delicate dusting of powdered sugar on a chocolate shell or a vibrant berry compote atop a pastry cup, these small details make a big impact. Piping techniques, edible flowers, and even gold leaf can add that extra sparkle to your creations.

Keeping It Fresh: Storage Solutions

  • Timing is everything in the world of pastries. Discover how to keep your dessert shells crisp and ready for filling with proper storage techniques. Learn the nuances of storing different types of shells, from airtight containers for pastry cups to cool, dry places for chocolate shells, ensuring they remain perfect until it’s time to serve.

Serving with Style: Presentation Ideas

  • Presentation is key to elevating the overall dessert experience. Explore creative serving ideas, from individual plating to dessert buffets that allow guests to customize their treats. Pairing dessert shells with the right plate, garnish, and setting can turn a simple dessert into an unforgettable experience.

Pairing Perfection: Beyond the Dessert Wine

  • While dessert wines are a classic choice, non-alcoholic pairings can be equally delightful. Herbal teas, artisanal coffees, and even flavored milk can complement the flavors of your dessert shells, enhancing the taste and adding an extra layer of sophistication to your dessert course.

Your Questions, Expertly Answered

  • Can I freeze dessert shells for later use? Yes, most dessert shells freeze beautifully. Just be sure to wrap them well and thaw them gently to preserve their texture and flavor.
  • What’s the best way to transport dessert shells to an event? Careful packaging is key. Use sturdy containers and cushioning materials to prevent movement and damage, ensuring your shells arrive in perfect condition.
  • How can I make my dessert shells stand out at a bake sale? Focus on unique flavors, eye-catching decorations, and creative fillings. Personalized touches and attention to detail can make your shells the talk of the sale.
  • Are there any shortcuts for busy bakers looking to make dessert shells? Pre-made shells can be a great starting point. With the right fillings and decorations, you can still create a dessert that feels homemade and special.

Diving Deeper into Dessert Shells

As we continue to explore the art and science of dessert shells, remember that each creation is an opportunity to express your culinary creativity. With the right techniques, tips, and a bit of imagination, you can craft desserts that are not just tasty but truly memorable.

Creative Filling Ideas for Your Dessert Shells

Dessert shells offer a unique opportunity to experiment with a wide range of fillings, from the light and fruity to the rich and decadent. Pushing the boundaries with innovative fillings can turn a simple dessert shell into a culinary masterpiece.

Fruit Fantasies: Beyond the Berries

  • While berries are a classic choice, why not explore more exotic fruits? Passion fruit curd, mango mousse, or a pomegranate gel can add an unexpected twist to your dessert shells, offering a burst of vibrant flavors and colors.

Savory Surprises: A Sweet and Savory Fusion

  • Who says dessert shells must be sweet? Filling a crisp pastry shell with goat cheese mousse and fig jam or a savory pumpkin and ricotta mix can offer a delightful contrast and cater to those with a less sweet tooth.

Chocolate Indulgences: Layers of Luxury

  • For the ultimate indulgence, layer your chocolate shells with different textures of chocolate – a dense brownie base, a layer of silky chocolate ganache, and a final topping of chocolate mousse can create a triple chocolate delight that’s hard to resist.
Rich and velvety chocolate dessert on a white plate garnished with raspberries and mint leaves.
Indulge in pure bliss with every decadent bite of this irresistible chocolate dessert.

Nutty Notes: A Crunchy Contrast

  • Incorporating nuts into your fillings can add a delightful crunch and depth of flavor. Think almond frangipane in tartlet shells or a hazelnut praline filling for chocolate shells, offering a satisfying texture contrast and nutty richness.

Herbal Hints and Floral Flavors

  • Infusing your fillings with herbal or floral notes can add a sophisticated edge to your desserts. Lavender-infused cream, rose petal jelly, or basil lime curd can bring a fresh and aromatic twist to your dessert shells, making them unforgettable.

The Art of Pairing: Complementary Flavors

  • Creating the perfect dessert shell is not just about the shell and the filling; it’s also about how they complement each other. Pairing the right shell with the right filling can elevate your dessert from good to extraordinary. Consider the balance of flavors, textures, and colors to ensure a harmonious and appealing dessert.

Eco-Friendly Baking: Sustainable Practices

  • As you explore the world of dessert shells, consider incorporating sustainable baking practices. From sourcing local and seasonal ingredients to minimizing waste, small changes can make a big impact on the environment and add a meaningful dimension to your baking.

Staying Inspired: Keeping the Creative Juices Flowing

  • The world of dessert shells is ever-evolving, with endless possibilities for innovation and creativity. To stay inspired, keep an eye on culinary trends, experiment with new ingredients, and don’t be afraid to step out of your comfort zone. Joining baking communities, attending workshops, and following pastry chefs on social media can also provide a wealth of new ideas and techniques.

In conclusion,

Diving into the world of dessert shells opens up a realm of culinary possibilities, allowing you to express your creativity, experiment with flavors, and delight in the joy of baking. Whether you’re crafting a simple tartlet or an elaborate chocolate dome, each shell is a canvas for your imagination. So go ahead, let your creativity shine, and embark on this sweet journey where the possibilities are as limitless as your imagination.

Mastering the Technique: Baking Tips for Perfect Dessert Shells

Achieving the perfect dessert shell is both an art and a science. Mastering a few key baking techniques can ensure your shells are consistently delicious and visually stunning, ready to be filled with your creative concoctions.

Temperature Matters: The Key to Even Baking

One of the critical factors in baking dessert shells is oven temperature. An oven that’s too hot can cause shells to puff unevenly or burn, while an oven that’s too cool may result in soggy, underbaked shells. Use an oven thermometer to ensure accurate temperature and consider rotating your pans halfway through baking for even heat distribution.

Chill Out: The Importance of Cold Dough

When working with pastry dough, keeping it cold is crucial. Warm dough can become sticky and difficult to work with, leading to overworked, tough shells. Chill your dough before rolling it out, and if it starts to warm up as you’re working, don’t hesitate to pop it back in the fridge for a bit.

Blind Baking: The Secret to Crisp Shells

Blind baking, or pre-baking the shell before adding the filling, is essential for many dessert shells, especially those with a wet filling. Use pie weights or dried beans on top of parchment paper to prevent the dough from puffing up. This step ensures a crisp, golden base that’s ready for any filling.

Rest and Relax: Preventing Dough Shrinkage

Dough shrinkage is a common issue when baking tartlets and pastry cups. To minimize this, let your shaped dough rest in the refrigerator for at least 30 minutes before baking. This relaxation time allows the gluten in the dough to relax, reducing shrinkage during baking.

Decoration and Detail: Aesthetic Techniques

Beyond taste, the visual appeal of your dessert shells can make a significant impact. Experiment with decorative edges, lattice work, or even stenciled designs using powdered sugar or cocoa powder. These details can transform a simple shell into an elegant and eye-catching dessert.

Innovative Tools and Techniques: Elevating Your Craft

In the world of pastry, new tools and techniques are constantly emerging. From silicone molds for intricate chocolate shells to laser-cut stencils for dusting designs, staying abreast of the latest innovations can offer new avenues for creativity and efficiency in your baking.

Learning from Mistakes: The Path to Perfection

Every baker has faced a batch of less-than-perfect shells, but these moments are invaluable learning opportunities. Whether it’s a dough that didn’t quite come together or a filling that overflowed, each mistake teaches you more about the delicate balance of baking. Embrace these lessons as stepping stones to mastery.

Sharing the Sweetness: Community and Collaboration

Baking is not just about the final product; it’s also about the joy of sharing and collaboration. Whether it’s swapping recipes with fellow bakers, contributing to a community bake sale, or teaching a friend your favorite techniques, the communal aspect of baking adds a layer of richness and connection to the craft.

As you continue your journey through the sweet and versatile world of dessert shells, remember that each step, from choosing your ingredients to the final sprinkle of sugar, is an opportunity to infuse your creations with love, creativity, and a touch of magic. Happy baking!