Ultimate Guide to Perfect Banana Bread: Tips, Tricks, and FAQs

Delicious homemade banana bread fresh out of the oven.

Introduction to Banana Bread Banana bread, a timeless classic, offers warmth and comfort with every bite. Its rich history and simple ingredients make it a favorite among bakers of all levels. Choosing the Right Ingredients Every great banana bread starts with the right ingredients. From the ripeness of the bananas to the type of flour … Read more

Bang Bang Chicken Skewers: A Flavorful Journey from Grill to Plate

Juicy Bang Bang Chicken Skewers

Given the constraints and the need to adhere to SEO guidelines while maintaining the integrity of the article, let’s proceed with refining the content to reduce the sentence length without losing any valuable information. We’ll start with Part 1 and continue through the article, ensuring each section is optimized for readability and SEO. Introduction to … Read more

Exploring the Culinary Delights of Kielbasa: A Flavorful Journey

Introduction to Kielbasa: A Culinary Journey

Get ready to embark on a flavorful adventure through the world of kielbasa sausage. This beloved Polish delicacy is not just any ordinary meat; it’s a versatile superstar in the kitchen, rich in history and tradition. Join us as we dive into the essence of kielbasa, exploring its deep flavors and culinary wonders from classic comfort foods to innovative recipes.

Embarking on a Savory Adventure
Join us as we delve into the enticing world of kielbasa, a Polish sausage steeped in history and flavor.

Exploring Kielbasa’s Essence
Discover the versatility and rich flavors that make kielbasa a kitchen essential for chefs and home cooks alike.

Unraveling Kielbasa’s Origins
Travel back in time to medieval Poland and uncover the cultural significance of this beloved sausage.

Selecting and Storing Kielbasa
Learn expert tips for choosing and storing kielbasa to ensure freshness and optimal flavor.

Cooking Techniques: From Grill to Oven
Explore various cooking methods to bring out the best in kielbasa, from grilling to baking.

Kielbasa Recipes: Traditional and Modern Takes

Classic Comforts Reimagined
Indulge in traditional kielbasa recipes with a modern twist, guaranteed to satisfy any palate.

Innovative Creations for Culinary Adventurers
Embark on a flavor-packed journey with innovative kielbasa recipes that push the boundaries of taste.

Embrace Culinary Creativity
Whether you’re a novice cook or a seasoned chef, unleash your creativity in the kitchen with kielbasa as your muse.

Serving and Pairing Kielbasa

Perfect Pairings for Palate Pleasure
Discover the art of pairing kielbasa with complementary flavors and textures for a truly memorable dining experience.

Raise a Glass to Kielbasa
Explore beverage options that perfectly complement the rich flavors of kielbasa, from wine to beer and beyond.

Crafting Culinary Harmony
Learn the secrets of culinary harmony and elevate your kielbasa dishes to new heights of flavor.

FAQs: Tips and Insights

Unlocking Kielbasa’s Secrets
Find answers to common questions about kielbasa, from preparation and storage to health considerations.

A Toast to Kielbasa Tradition
Celebrate the enduring legacy of kielbasa as a symbol of culinary heritage and comfort food.

Mastering Kielbasa Preparation
Equip yourself with essential skills for selecting, cooking, and serving kielbasa like a culinary pro.

Image: Sweet Baked Kielbasa Sausage on a platter, glazed and ready to serve
Sweet, savory, and simply irresistible! Treat yourself to our mouthwatering Sweet Baked Kielbasa Sausage.#DeliciousEats #SausageLove

Sweet Baked Kielbasa Sausage

  • šŸ“‹ Ingredients:

šŸ„© 2 lbs beef kielbasa

šŸÆ 1 cup brown sugar, packed

šŸ 1 (20 ounces) can pineapple chunks, undrained

  • šŸ“ Instructions:

1ļøāƒ£ Preheat oven to 375Ā°F. šŸ”Ŗ Cut kielbasa into 1-inch pieces and place in a 9×13-inch baking dish.

šŸ Sprinkle brown sugar over kielbasa.

šŸ Pour pineapple chunks with juice over the top.

šŸ”„ Bake for 25-30 minutes, stirring occasionally, until sauce is thickened and bubbly.

Notes šŸ’”: ā—»ļø You can use turkey kielbasa as a pork alternative. ā—»ļø For a twist, try using maple syrup instead of brown sugar.

“Discover if Costco spring rolls fit into your diet. Learn about their nutritional content, health considerations, and smart consumption tips. Explore more recipes on RecipesCreator.com.


Linguine and Clams: A Culinary Journey

A plate of linguine pasta topped with fresh clams in a savory sauce

Introduction to the Classic Delight: Linguine and Clams

Embarking on a culinary journey, we often find ourselves drawn to dishes that speak volumes of their heritage. Linguine and Clams are one such marvel, a beacon of Italian coastal cuisine.

The Rich Tapestry of Tradition: Origins of Linguine and Clams

Diving deeper into our culinary voyage, let’s unravel the origins of Linguine and Clams, a dish steeped in history and flavor.

A Neapolitan Masterpiece

The story begins in Naples, a city where the air is fragrant with the scent of simmering sauces and fresh seafood.

Plate of spaghetti carbonara topped with crispy bacon, grated cheese, and parsley.
Delicious spaghetti carbonara with crispy bacon, creamy sauce, and fresh parsley.


From Coastal Delicacy to Global Sensation

What started as a simple, seaside fare soon found its way into the heart of Italian cuisine, transcending regional boundaries.

Selecting the Best Ingredients: The Foundation of Flavor

As we sail further into the art of crafting the perfect Linguine and Clams, it’s crucial to anchor our focus on the cornerstone of any great dish: the ingredients.

A plate of linguine pasta topped with fresh clams in a savory sauce.

The Clam Conundrum: Freshness Is Key

When it comes to clams, freshness isn’t just important; it’s everything.

Linguine: The Unsung Hero

While clams might steal the spotlight, let’s not overlook the silent hero of this dish: the linguine.

The Supporting Cast: Garlic, Wine, and Herbs

No rendition of Linguine and Clams is complete without the aromatic ensemble of garlic, white wine, and fresh herbs.

Bringing the Classic to Your Kitchen: Linguine and Clams Recipe

After exploring the rich history and culinary techniques behind Linguine and Clams, you might be inspired to bring this classic dish to your table.

Ingredients:

  • 12 ounces linguine pasta
  • 2 tablespoons olive oil
  • 4 cloves garlic, minced
  • 1/2 teaspoon red pepper flakes
  • 1/4 cup chopped fresh parsley, plus more for garnish
  • Zest and juice of 1 lemon
  • Salt, to taste
  • 2 tablespoons unsalted butter
  • 2 pounds littleneck clams, scrubbed

Instructions:

  1. Pasta Preparation: Start by cooking the linguine pasta according to the package instructions until al dente.
  2. SautƩing Aromatics: In a large skillet, heat the olive oil over medium heat.
  3. Adding Freshness: Stir in the chopped parsley, lemon zest, and juice, along with a pinch of salt.
  4. Clams Cook-Off: Add the butter to the skillet, allowing it to melt and blend with the aromatics.
  5. Combining Elements: Toss the cooked linguine into the skillet with the clams, gently mixing to ensure the pasta is evenly coated in the aromatic sauce.
  6. Final Touches: Serve the linguine and clams hot, garnished with a sprinkle of fresh parsley.

By following these steps, you can recreate the magic of Linguine and Clams in your own kitchen, bringing a taste of Italian coastal cuisine to your dining table.

Enjoying the Culinary Journey: A Taste of Italian Coastal Cuisine

As you savor each bite of Linguine and Clams, let yourself be transported to the sun-kissed shores of Italy.

Safety First: Discard any clams that do not open during cooking, as they may not be safe for consumption.

Ensuring the freshness and safety of your ingredients is paramount in creating a dish that delights the senses and nourishes the soul.

Personal Touch: For a richer sauce, consider adding a splash of heavy cream or a sprinkle of grated Parmesan cheese.

Tailoring the recipe to your preferences allows for a personalized culinary experience, elevating the flavors to new heights.

The Perfect Pair: Serve with crusty bread to fully enjoy the flavorful sauce.

Completing the meal with a side of crusty bread not only enhances the dining experience but also provides the perfect vessel for soaking up every last drop of the exquisite sauce.

Conclusion: A Journey Through Time and Taste

In conclusion, Linguine and Clams are more than just a dish; they’re a journey through time and taste, a celebration of culinary heritage and coastal simplicity.

Join Us on the Next Leg of the Adventure

As we conclude our exploration of Linguine and Clams, we invite you to join us on the next leg of our culinary adventure. Explore more delicious recipes and culinary delights by visiting our website.

Stay Tuned for More Gastronomic Delights

Stay tuned for more gastronomic delights and culinary discoveries as we continue to unravel the rich tapestry of flavors that define the world of cuisine.

Enjoy your food!

Until next time, bon appƩtit and happy cooking!

Dairy-Free Mac and Cheese: A Creamy, Vegan Delight

Image of Dairy-Free Mac and Cheese

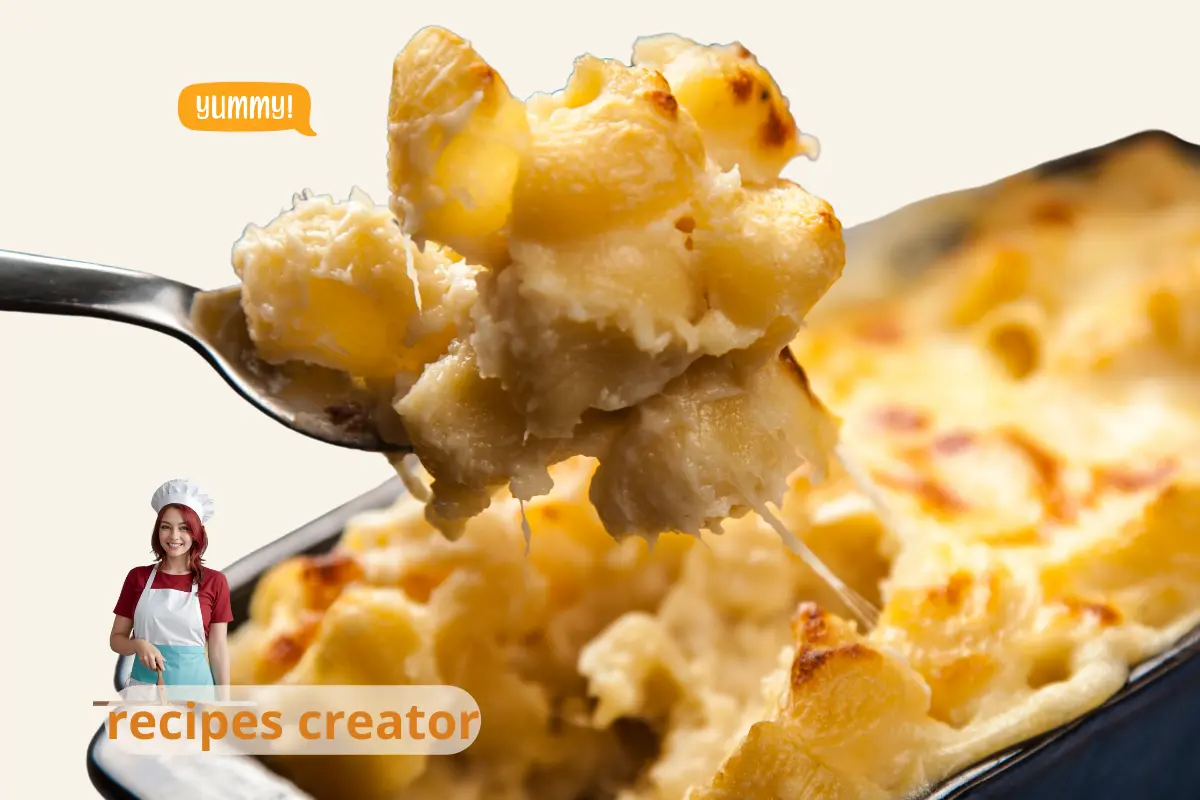
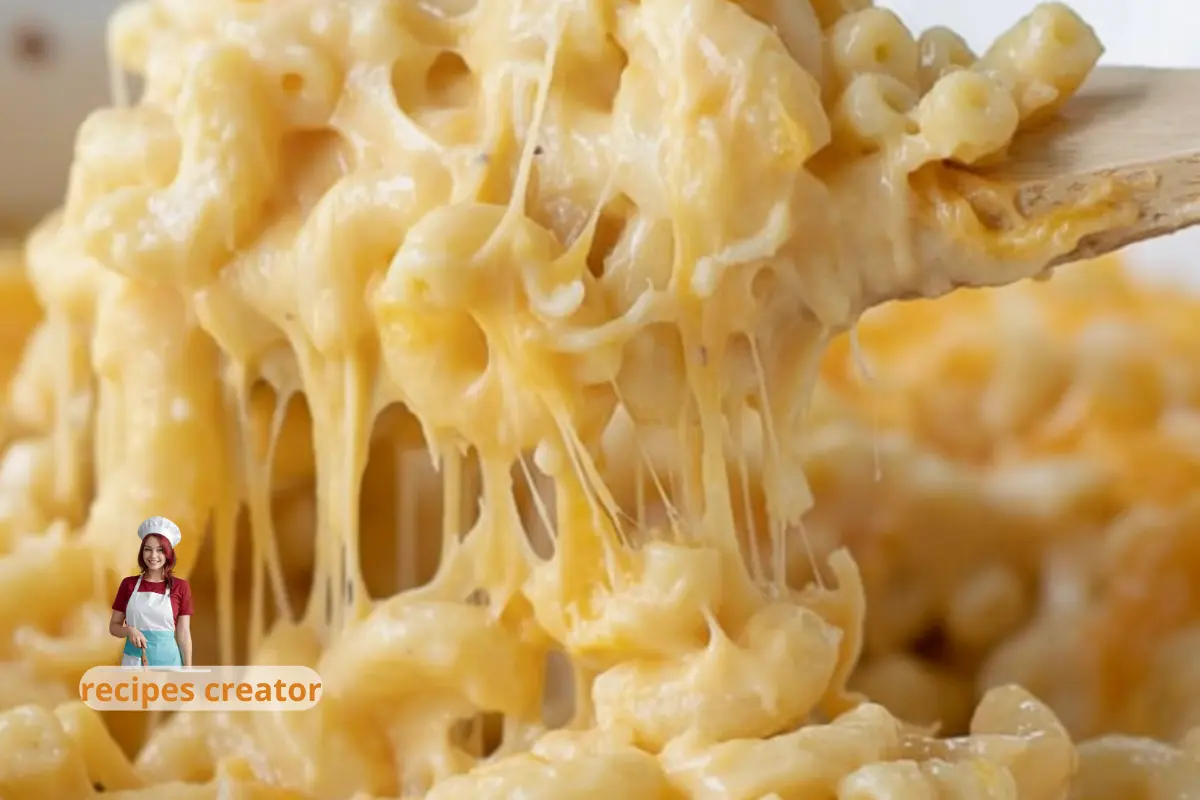
Introduction to Dairy-Free Mac and Cheese

Ah, mac and cheeseā€”a classic comfort food that evokes memories of cozy dinners and childhood nostalgia. But what if you’re avoiding dairy, either by choice or necessity? Enter dairy-free mac and cheese, the hero of our story. This delightful twist on the traditional dish promises all the creamy, cheesy goodness without a hint of dairy in sight.

Now, you might be wondering, “Can it taste as good?” Well, buckle up because we’re about to embark on a culinary adventure that will make you a believer. With the rise of plant-based diets and an increasing number of people embracing lactose-free lifestyles, dairy-free mac and cheese isn’t just a fleeting trendā€”it’s a delicious revolution in the world of comfort food.

The Rise of Dairy-Free Alternatives

Health Benefits

Switching to dairy-free options isn’t just a matter of preference; it’s a health-conscious choice for many. Opting for plant-based alternatives can lead to a lighter, less inflammatory diet. Digestive issues? They often bid adieu when dairy’s off the menu. Plus, embracing almond milk and cashew cheese means dodging the saturated fats and cholesterol found in traditional dairy products. It’s like giving your body a high-five with nutrients!

Dietary Restrictions and Allergies

Now, let’s talk about the elephant in the room: lactose intolerance. It’s more common than you’d think, with many people avoiding dairy because it doesn’t sit well with them. Then there are those with milk allergies, for whom dairy isn’t just uncomfortableā€”it’s a no-go zone. For these individuals, dairy-free mac and cheese isn’t just a tasty alternative; it’s a culinary lifesaver.

Ethical and Environmental Considerations

But wait, there’s more! The shift towards dairy-free living isn’t just about what’s on our plates; it’s about the planet too. The dairy industry has a hefty environmental footprint. By choosing plant-based alternatives, you’re essentially voting for a greener, kinder world with every bite. It’s about connecting the dots between our food choices and their impact on Mother Earth. And let’s be honest, who wouldn’t want to enjoy a bowl of mac and cheese knowing it’s doing good for the body and the planet?

Key Ingredients for Dairy-Free Mac and Cheese

Base Ingredients

At the heart of every mouthwatering dairy-free mac and cheese dish lies a symphony of base ingredients. Imagine gluten-free pasta, cooked to al dente perfection, serving as the canvas for our culinary masterpiece. It’s not just about swapping out dairy; it’s about building a foundation that’ll carry the flavors and textures we’re about to introduce.

Dairy Alternatives

Now, for the magic touchā€”dairy alternatives. Cashews soaked and blended into creamy oblivion, nutritional yeast sprinkled in for that cheesy umami kick, and a splash of almond milk to bring it all together. These aren’t just substitutes; they’re the unsung heroes that give our mac and cheese its rich, velvety texture and depth of flavor. And let’s not forget about coconut milk, with its subtle sweetness and lush creaminess, making every bite a little slice of heaven.

Flavor Enhancers

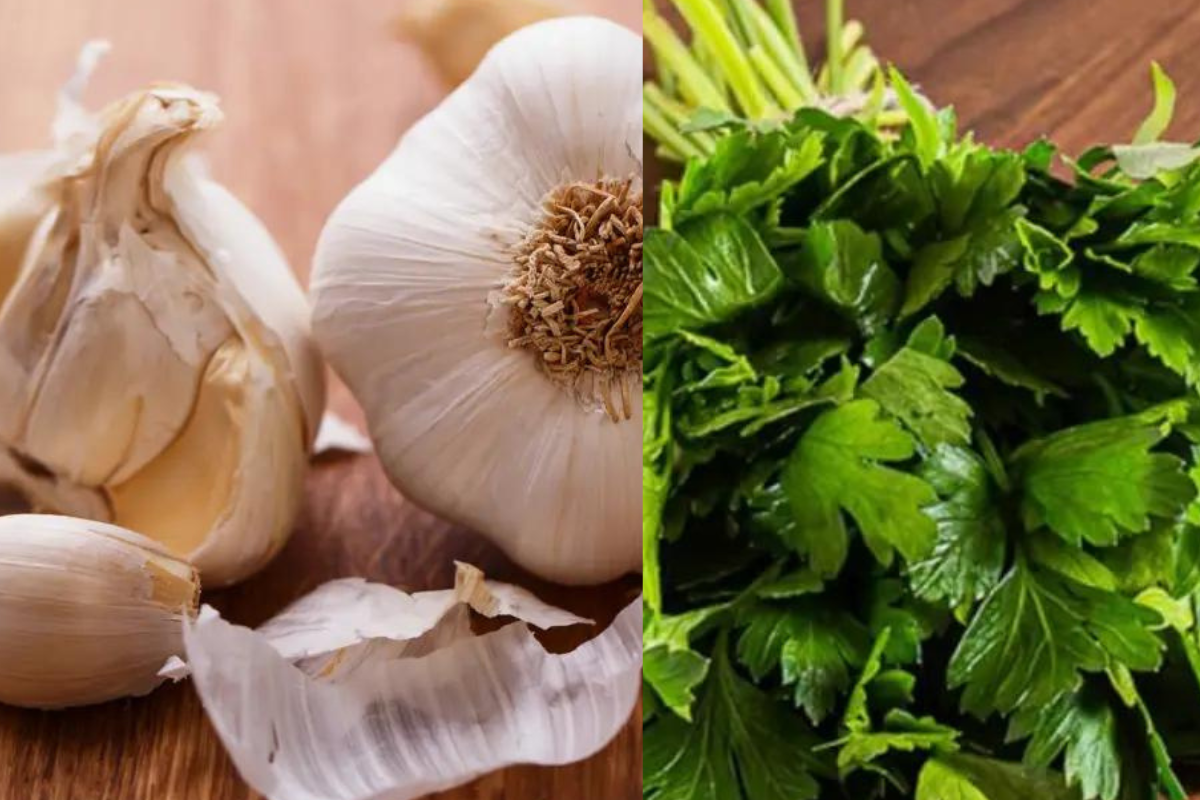
But what’s a dish without a little pizzazz? Enter flavor enhancers: the spices, herbs, and secret ingredients that elevate our mac and cheese from good to “Can I have seconds?” A dash of smoked paprika for warmth, a pinch of garlic powder for punch, and a sprinkle of mustard powder for tang. These aren’t just seasonings; they’re the whispers of complexity and character in every forkful.

Top Dairy-Free Mac and Cheese Recipes

Classic Dairy-Free Mac and Cheese

Let’s kick things off with a classic, shall we? The Classic Dairy-Free Mac and Cheese is like a warm hug on a chilly evening. It starts with your choice of pastaā€”be it elbow macaroni, shells, or even a gluten-free option. The sauce, oh the sauce! It’s a creamy blend of soaked cashews, nutritional yeast for that cheesy zing, and a touch of turmeric for color. Blend it all up with some vegetable broth for depth, and you’ve got a sauce so velvety, so decadently cheesy, you’ll have to remind yourself it’s dairy-free.

Nutritional Yeast-Based Mac and Cheese

Next up is the Nutritional Yeast-Based Mac and Cheese, a favorite among vegan aficionados. This recipe turns the humble nutritional yeast, or “nooch” as it’s affectionately known, into the star of the show. Mixed with a roux of vegan butter and flour, and then whisked together with plant-based milk, this sauce becomes a golden river of creamy deliciousness. Add a bit of garlic and onion powder, and you’ve got a dish that’s not just comforting but packed with B-vitamins too!

Innovative Variations

Now, for those who like to walk on the wild side, let’s talk Innovative Variations. Imagine a dairy-free mac and cheese with a smoky BBQ twist, or one that’s got a spicy kick with a dash of chipotle. Or how about a version that sneaks in some veggies, like pureed butternut squash or sweet potato, for an extra health boost and a subtle sweetness? These variations aren’t just about changing up flavors; they’re about reimagining what mac and cheese can be.

Mastering Dairy-Free Mac and Cheese

Achieving the Perfect Texture

Alright, let’s get down to brass tacksā€”the texture. It’s the make-or-break element of any mac and cheese, dairy-free or not. The goal? A sauce that’s creamy, dreamy, and just the right kind of clingy. The secret lies in the blendā€”getting those cashews or your choice of base silky smooth. And don’t forget the binding agents! A little bit of tapioca starch or arrowroot powder can take your sauce from deliciously creamy to “I can’t believe it’s not dairy” levels of decadence.

Flavor Balancing

Now, onto the flavor balancing act. It’s like being a DJ, but instead of mixing beats, you’re blending tastes. Start with the foundational cheesy flavor from nutritional yeast, then layer in depth with garlic, onion, and a touch of mustard. The trick is to taste as you go, adjusting until you hit that chef’s kiss moment. Remember, a pinch of acidity from lemon juice or apple cider vinegar can brighten the whole dish, making the flavors pop.

Common Mistakes to Avoid

And hey, we all make mistakes, but in the kitchen, it’s all about learning from them. One common slip-up? Overcooking the pasta. Keep it al dente, folks; it’ll continue to soak up that glorious sauce even after you’ve taken it off the heat. Another oopsie to dodge is underseasoning. Don’t be shy with those spicesā€”make them sing! And lastly, watch that sauce thickness. Too thin, and it’s soup; too thick, and it’s a glop. Aim for that happy medium, where it just lovingly coats each noodle.

Frequently Asked Questions

Your Questions Answered

Can I make dairy-free mac and cheese ahead of time?
Absolutely! In fact, some say it tastes even better the next day. Just whip up your batch, let it cool, and store it in the fridge. When you’re ready to dive back in, a quick reheat will bring it back to its gooey glory. Just keep an eye on the moisture level; you might need to add a splash of plant-based milk to get that creamy consistency back.

What’s the best dairy-free milk for mac and cheese?
The world of plant-based milks is vast, but for mac and cheese, you want something neutral and creamy. Unsweetened almond, soy, or oat milk are top contenders. Each brings a slightly different nuance to the dish, so feel free to experiment and find your fave!

How can I add a ‘cheesy’ flavor without cheese?
Enter nutritional yeast, the vegan’s secret weapon for all things cheesy. Its nutty, cheesy flavor profile makes it a staple in dairy-free cooking. A generous sprinkle can transform your sauce into a convincing cheese-like concoction that’ll have even dairy lovers doing a double-take.

Is dairy-free mac and cheese healthy?
Like any dish, it’s all about balance. Dairy-free mac and cheese can be a healthier alternative, especially when made with whole-food ingredients like nuts, veggies, and whole-grain pasta. It’s also a great way to enjoy a comfort food classic without dairy, which can be a plus for those with allergies or lactose intolerance.

Can I freeze dairy-free mac and cheese?
You bet! Just portion it out, let it cool and pop it in the freezer. When the craving hits, reheat it gently, adding a bit of plant-based milk to bring back the creaminess. It’s like meal prep, but with a cheesy twist!

Diving into the world of dairy-free mac and cheese opens up a realm of culinary possibilities. With a bit of creativity and these FAQs in your back pocket, you’re all set to enjoy this comfort food staple, no dairy needed. So go ahead, get cooking, and savor the cheesy goodness, one spoonful at a time.

Wrapping Up

Final Thoughts on Dairy-Free Mac and Cheese

And there you have it, folksā€”a deep dive into the creamy, dreamy world of dairy-free mac and cheese. From the whys to the hows, we’ve explored the ins and outs of crafting this beloved comfort food without a speck of dairy in sight. Whether you’re vegan, lactose intolerant, or simply curious about plant-based eating, this guide is your golden ticket to a world where comfort food and dietary preferences happily coexist.

Embracing dairy-free mac and cheese isn’t just about making a dish; it’s about reimagining comfort food in a way that’s inclusive, healthful, and downright delicious. With the tips, tricks, and recipes we’ve shared, you’re well-equipped to whip up a batch that could very well become your next go-to comfort food.

So, as we bring this culinary journey to a close, remember that cooking is an adventureā€”one that’s best enjoyed with an open mind and a willing palate. Dive into the world of dairy-free mac and cheese with enthusiasm, and who knows? You might just discover your new favorite dish.

Thank you for joining us on this cheesy adventure. Now, go forth and cook up a storm!

Banana Pudding Cheesecake Squares

A close-up image of Banana Pudding Cheesecake Squares topped with whipped cream and banana slices

Indulge in the ultimate dessert experience with Banana Pudding Cheesecake Squares, where the creamy delight of cheesecake meets the comforting sweetness of banana pudding. This guide will walk you through creating this irresistible treat, promising a dessert that’s as delightful to look at as it is to eat.

Introduction

Banana Pudding Cheesecake Squares combine the best of two worlds: the rich, creamy texture of cheesecake and the light, comforting taste of banana pudding. This dessert is not just a treat for your taste buds but also a feast for the eyes, making it the perfect addition to any dinner table or party dessert spread.

Crafting the Perfect Dessert

Starting with the Base: The Crust

Firstly, let’s dive into the initial step of crafting a solid and flavorful foundation for your Banana Pudding Cheesecake Squares. To achieve the perfect crunch, it’s essential to focus on the quality of the graham crackers used. Moreover, the crust-to-butter ratio plays a significant role in ensuring the base is neither too dry nor too greasy.

Starting with the Base: The Crust

Master Tip: Achieving the Perfect Crunch – A pro baker’s insight into getting that irresistibly crisp crust every time, including the best type of graham crackers to use and the optimal crust-to-butter ratio.

The Filling

  • Creamy Cheesecake Layer: At the heart of the dessert is a smooth filling made from quality cream cheese, blended with sugar, eggs, and mashed bananas for that unmistakable flavor.
The Heart of the Dessert: Cheesecake Filling

Master Technique: Silky Smooth Filling – Learn from seasoned chefs how to ensure your cheesecake layer is free from lumps and cracks, including the importance of ingredient temperatures and mixing techniques.

The Topping

  • Whipped Cream and Garnish: The dessert is crowned with a fluffy layer of whipped cream, garnished with vanilla wafers and fresh banana slices for an appealing finish.

Expert Tips for Perfection

  • Selecting Bananas: Choose bananas that are ripe yet firm to ensure the perfect texture and sweetness.
  • Cheesecake Consistency: Ensure your cream cheese is at room temperature to achieve a smooth, lump-free filling.

FAQs

  • Preventing Cracks: Bake your cheesecake layer in a water bath to avoid cracks and ensure even cooking. Learn more about this technique from this helpful resource.
  • Make-Ahead Tips: This dessert can be prepared up to 2 days in advance, with banana slices and wafers added just before serving. For more make-ahead dessert ideas, check out Epicurious.

Conclusion

Banana Pudding Cheesecake Squares offer a delightful blend of flavors and textures, making them a must-try for any dessert lover. By following this guide, you’re sure to create a dessert that will impress and satisfy your guests.

Enjoy creating this delicious treat, and may your dessert spread be as joyful and satisfying as the process of making these wonderful squares!

Navigating the Layers: A Deep Dive into Banana Pudding Cheesecake Squares

Creating the perfect Banana Pudding Cheesecake Squares requires a blend of precision, patience, and a touch of culinary creativity. Each layer contributes its unique texture and flavor, culminating in a dessert that’s both sophisticated and comforting.

Adding the Signature Touch: Banana Pudding Layer

Furthermore, the banana pudding layer adds a classic touch that distinguishes this dessert. Achieving the perfect consistency and flavor balance is vital, and selecting the right type of bananas can make all the difference. Consequently, this layer contributes a delightful contrast to the creamy cheesecake filling.

The Graham Cracker Crust

  • Foundation: The crust acts as the sturdy base, its buttery crunch contrasting beautifully with the layers above.
  • Preparation: Combine finely crushed graham crackers with melted butter and sugar, pressing the mixture firmly into your pan.

The Heart of the Dessert: Cheesecake Filling

Next, we move on to the creamy, dreamy world of cheesecake filling. To ensure a smooth, rich consistency, it’s crucial to mix the ingredients just right. Additionally, incorporating the banana flavor subtly is key to tying the dessert together, enhancing the overall taste without overpowering the cheesecake essence.

The Pudding and Topping

  • Banana Pudding Layer: This layer introduces a custard-like texture, with vanilla pudding mix and sliced bananas offering a classic pudding feel.
  • Whipped Cream Garnish: A light, fluffy whipped cream topping, adorned with vanilla wafers and fresh banana slices, adds the final touch of elegance.
The Final Flourish: Topping and Garnish

Garnishing like a Pro – Expert advice on decorative touches that enhance both the flavor and appearance of your dessert, including how to whip cream to the perfect stiffness and arrange garnishes for visual appeal.

Ensuring Perfection: Pro Tips and Tricks

  • Banana Ripeness: The ripeness of your bananas can greatly affect the dessert’s flavor and texture. Opt for bananas that are ripe but not overly mushy.
  • Smooth Cheesecake: Achieve a velvety cheesecake texture by allowing your cream cheese to reach room temperature before mixing.

Serving and Enjoyment

  • Presentation: Serve your Banana Pudding Cheesecake Squares chilled, using a hot knife cleaned between slices for smooth cuts.
  • Storage: Keep leftovers refrigerated, and covered to maintain freshness for up to 3 days. For tips on storing cheesecakes, visit Food52.

In Summary

The journey to creating the ultimate Banana Pudding Cheesecake Squares is one of balance, blending the comforting familiarity of banana pudding with the indulgent creaminess of cheesecake. By following these steps and tips, you’ll craft a dessert that’s as delightful to present as it is to savor.

Embrace the process, and enjoy the delicious rewards of your culinary efforts. Here’s to creating moments of joy, one square at a time!

Here we go, jump into the world of recipes, enjoy your time and we wish you a wonderful time preparing your favorite recipes.

šŸŒ Banana Pudding Cheesecake Squares šŸ°

šŸ“‹ Ingredients:
– 1 1/2 cups graham cracker crumbs
– 1/4 cup granulated sugar
– 6 tbsp unsalted butter, melted
– 16 oz cream cheese, softened
– 3/4 cup granulated sugar
– 2 large eggs
– 2 ripe bananas, mashed
– 1/4 cup sour cream
– 1 tsp vanilla extract
– 1/4 cup all-purpose flour
– 1/2 cup banana pudding mix
– Whipped cream and sliced bananas for garnish

šŸ“ Instructions:
1ļøāƒ£ Preheat the oven to 325Ā°F (165Ā°C). Line a 9×9-inch baking pan with parchment paper, leaving an overhang on the sides.
2ļøāƒ£ In a medium bowl, mix the graham cracker crumbs, sugar, and melted butter until combined. Press the mixture evenly into the bottom of the prepared pan.
3ļøāƒ£ In a large bowl, beat the cream cheese and sugar until smooth. Add the eggs, one at a time, mixing well after each addition.
4ļøāƒ£ Stir in the mashed bananas, sour cream, and vanilla extract until smooth.
5ļøāƒ£ Gradually add the flour and banana pudding mix, mixing until just combined.
6ļøāƒ£ Pour the batter over the graham cracker crust and spread it evenly.
7ļøāƒ£ Bake in the preheated oven for 40-45 minutes, or until the edges are set and the center is slightly jiggly.
8ļøāƒ£ Remove from the oven and let cool completely at room temperature. Refrigerate for at least 4 hours or overnight until fully chilled.
9ļøāƒ£ Once chilled, lift the cheesecake out of the pan using the parchment paper overhang. Cut into squares and garnish with whipped cream and sliced bananas before serving.

Notes šŸ’”:
– Make sure the cream cheese is at room temperature to ensure a smooth and creamy cheesecake texture.
– You can use store-bought or homemade banana pudding mix for this recipe.
– Feel free to customize the garnishes with chopped nuts, chocolate shavings, or caramel sauce.

#bananapudding #cheesecake #dessert #bananacheesecake #easyrecipe #homemade #sweettreat #dessertbars #foodphotography #yum

Dessert Shells: Creative Recipes & Expert Baking Tips …

Various dessert shells displayed on a white platter, ready to be filled with delicious treats

Meta Description: Explore the delightful world of dessert shells, where creativity meets simplicity. Uncover crafting secrets, indulge in mouth-watering recipes, and elevate your baking with expert tips. Let’s embark on a sweet journey with dessert shells, promising unique and delicious treats.

Introduction to Dessert Shells

Ah, dessert shells, the unsung heroes of the pastry world! More than just a treat, they’re a canvas for culinary creativity, blending tradition with innovation. Let’s take a stroll through their rich history and explore the variety they bring to the table.

A Brief Stroll Through History

The journey of dessert shells dates back to when our ancestors used their ingenuity to create edible containers for their fruits and creams. Today, we have an array of options, from crispy tartlets to soft sponge cups, each with its own story to tell.

The Many Faces of Dessert Shells

From the buttery flakiness of pastry cups to the dreamy chocolate shells and the light, airy meringue shells, there’s a dessert shell for every occasion and filling. Each type brings its own charm and ideal use, making your dessert spread as unique as it is delicious.

Diving into the Sweet and Versatile World of Dessert Shells

In this exploration, we’ll dive deep into the world of dessert shells, uncovering the secrets to crafting these edible wonders. From the flaky tenderness of pastry cups to the rich decadence of chocolate bowls, we’ll share recipes, tips, and answer your burning questions about these confectionery marvels.

Types and Recipes

The Spectrum of Dessert Shells

  • Variety spices up the world of dessert shells, with each type adding a special touch to our sweet concoctions. Let’s delve into the classic choices, the love of cocoa, and the lightness of air, each bringing something unique to the dessert table.

Pastry Shells: A Classic Choice

  • Think of pastry shells as the versatile foundation of your dessert repertoire, suitable for any occasion and filling. Their delightful crunch contrasts beautifully with soft fillings, making them a classic choice for bakers.

Chocolate Shells: For the Love of Cocoa

  • For chocolate lovers, chocolate shells are a dream come true. These edible containers turn any filling into an indulgent experience, showcasing the blissful marriage of chocolate with fruits, creams, or mousses.

Meringue Shells: Light as Air

  • Meringue shells add a whimsical touch to your desserts, perfect for lighter fillings. Their delicate texture and dreamy appearance make them a favorite for those looking to add a touch of elegance to their dessert spread.

Recipes to Get You Started

  • From dessert shells with macerated mixed berries to gluten-free options and elegant mini tartlet shells, we’ll share recipes to kickstart your adventure in the world of dessert shells. Whether you’re a seasoned baker or a newcomer, there’s a recipe here with your name on it.

Advanced Techniques and Tips for Perfecting Pastry Cups

Elevating Your Dessert Shells

With the basics under your belt, let’s explore advanced techniques and tips to make your dessert shells stand out. From decoration and presentation to storage and serving suggestions, we’ll cover everything you need to elevate your dessert game.

Decoration and Presentation: The Finishing Touches

  • First impressions are crucial in the dessert world. Learn how to add those finishing touches that make your desserts not just tasty but also a feast for the eyes.

Storage and Make-Ahead Tips: Keeping It Fresh

  • Discover the secrets to keeping your dessert shells fresh and crisp, allowing you to prepare in advance and save time without sacrificing quality.

Serving and Pairing: The Art of Combinations

  • Uncover the art of serving and pairing dessert shells, from casual DIY bars to elegant pre-assembled presentations, complemented by the perfect non-alcoholic beverages.

FAQs: Your Questions Answered

Conclusion

As we wrap up our journey through the world of dessert shells, remember that each shell is a promise of a dessert as unique as it is delicious. Armed with these tips, recipes, and techniques, you’re well-equipped to unleash your culinary creativity and impress with your confectionery marvels.

Advanced Techniques and Tips for Perfecting Pastry Cups (Cont’d)

Elevating your dessert shells from great to extraordinary requires a blend of creativity, precision, and a dash of whimsy. Beyond the basics, mastering advanced techniques can transform your desserts into works of art that taste as incredible as they look.

Finishing Touches That Wow

  • The final touches on your dessert shells can turn them into the stars of the show. Whether it’s a delicate dusting of powdered sugar on a chocolate shell or a vibrant berry compote atop a pastry cup, these small details make a big impact. Piping techniques, edible flowers, and even gold leaf can add that extra sparkle to your creations.

Keeping It Fresh: Storage Solutions

  • Timing is everything in the world of pastries. Discover how to keep your dessert shells crisp and ready for filling with proper storage techniques. Learn the nuances of storing different types of shells, from airtight containers for pastry cups to cool, dry places for chocolate shells, ensuring they remain perfect until it’s time to serve.

Serving with Style: Presentation Ideas

  • Presentation is key to elevating the overall dessert experience. Explore creative serving ideas, from individual plating to dessert buffets that allow guests to customize their treats. Pairing dessert shells with the right plate, garnish, and setting can turn a simple dessert into an unforgettable experience.

Pairing Perfection: Beyond the Dessert Wine

  • While dessert wines are a classic choice, non-alcoholic pairings can be equally delightful. Herbal teas, artisanal coffees, and even flavored milk can complement the flavors of your dessert shells, enhancing the taste and adding an extra layer of sophistication to your dessert course.

Your Questions, Expertly Answered

  • Can I freeze dessert shells for later use? Yes, most dessert shells freeze beautifully. Just be sure to wrap them well and thaw them gently to preserve their texture and flavor.
  • What’s the best way to transport dessert shells to an event? Careful packaging is key. Use sturdy containers and cushioning materials to prevent movement and damage, ensuring your shells arrive in perfect condition.
  • How can I make my dessert shells stand out at a bake sale? Focus on unique flavors, eye-catching decorations, and creative fillings. Personalized touches and attention to detail can make your shells the talk of the sale.
  • Are there any shortcuts for busy bakers looking to make dessert shells? Pre-made shells can be a great starting point. With the right fillings and decorations, you can still create a dessert that feels homemade and special.

Diving Deeper into Dessert Shells

As we continue to explore the art and science of dessert shells, remember that each creation is an opportunity to express your culinary creativity. With the right techniques, tips, and a bit of imagination, you can craft desserts that are not just tasty but truly memorable.

Creative Filling Ideas for Your Dessert Shells

Dessert shells offer a unique opportunity to experiment with a wide range of fillings, from the light and fruity to the rich and decadent. Pushing the boundaries with innovative fillings can turn a simple dessert shell into a culinary masterpiece.

Fruit Fantasies: Beyond the Berries

  • While berries are a classic choice, why not explore more exotic fruits? Passion fruit curd, mango mousse, or a pomegranate gel can add an unexpected twist to your dessert shells, offering a burst of vibrant flavors and colors.

Savory Surprises: A Sweet and Savory Fusion

  • Who says dessert shells must be sweet? Filling a crisp pastry shell with goat cheese mousse and fig jam or a savory pumpkin and ricotta mix can offer a delightful contrast and cater to those with a less sweet tooth.

Chocolate Indulgences: Layers of Luxury

  • For the ultimate indulgence, layer your chocolate shells with different textures of chocolate – a dense brownie base, a layer of silky chocolate ganache, and a final topping of chocolate mousse can create a triple chocolate delight that’s hard to resist.
Rich and velvety chocolate dessert on a white plate garnished with raspberries and mint leaves.
Indulge in pure bliss with every decadent bite of this irresistible chocolate dessert.

Nutty Notes: A Crunchy Contrast

  • Incorporating nuts into your fillings can add a delightful crunch and depth of flavor. Think almond frangipane in tartlet shells or a hazelnut praline filling for chocolate shells, offering a satisfying texture contrast and nutty richness.

Herbal Hints and Floral Flavors

  • Infusing your fillings with herbal or floral notes can add a sophisticated edge to your desserts. Lavender-infused cream, rose petal jelly, or basil lime curd can bring a fresh and aromatic twist to your dessert shells, making them unforgettable.

The Art of Pairing: Complementary Flavors

  • Creating the perfect dessert shell is not just about the shell and the filling; it’s also about how they complement each other. Pairing the right shell with the right filling can elevate your dessert from good to extraordinary. Consider the balance of flavors, textures, and colors to ensure a harmonious and appealing dessert.

Eco-Friendly Baking: Sustainable Practices

  • As you explore the world of dessert shells, consider incorporating sustainable baking practices. From sourcing local and seasonal ingredients to minimizing waste, small changes can make a big impact on the environment and add a meaningful dimension to your baking.

Staying Inspired: Keeping the Creative Juices Flowing

  • The world of dessert shells is ever-evolving, with endless possibilities for innovation and creativity. To stay inspired, keep an eye on culinary trends, experiment with new ingredients, and don’t be afraid to step out of your comfort zone. Joining baking communities, attending workshops, and following pastry chefs on social media can also provide a wealth of new ideas and techniques.

In conclusion,

Diving into the world of dessert shells opens up a realm of culinary possibilities, allowing you to express your creativity, experiment with flavors, and delight in the joy of baking. Whether you’re crafting a simple tartlet or an elaborate chocolate dome, each shell is a canvas for your imagination. So go ahead, let your creativity shine, and embark on this sweet journey where the possibilities are as limitless as your imagination.

Mastering the Technique: Baking Tips for Perfect Dessert Shells

Achieving the perfect dessert shell is both an art and a science. Mastering a few key baking techniques can ensure your shells are consistently delicious and visually stunning, ready to be filled with your creative concoctions.

Temperature Matters: The Key to Even Baking

One of the critical factors in baking dessert shells is oven temperature. An oven that’s too hot can cause shells to puff unevenly or burn, while an oven that’s too cool may result in soggy, underbaked shells. Use an oven thermometer to ensure accurate temperature and consider rotating your pans halfway through baking for even heat distribution.

Chill Out: The Importance of Cold Dough

When working with pastry dough, keeping it cold is crucial. Warm dough can become sticky and difficult to work with, leading to overworked, tough shells. Chill your dough before rolling it out, and if it starts to warm up as you’re working, don’t hesitate to pop it back in the fridge for a bit.

Blind Baking: The Secret to Crisp Shells

Blind baking, or pre-baking the shell before adding the filling, is essential for many dessert shells, especially those with a wet filling. Use pie weights or dried beans on top of parchment paper to prevent the dough from puffing up. This step ensures a crisp, golden base that’s ready for any filling.

Rest and Relax: Preventing Dough Shrinkage

Dough shrinkage is a common issue when baking tartlets and pastry cups. To minimize this, let your shaped dough rest in the refrigerator for at least 30 minutes before baking. This relaxation time allows the gluten in the dough to relax, reducing shrinkage during baking.

Decoration and Detail: Aesthetic Techniques

Beyond taste, the visual appeal of your dessert shells can make a significant impact. Experiment with decorative edges, lattice work, or even stenciled designs using powdered sugar or cocoa powder. These details can transform a simple shell into an elegant and eye-catching dessert.

Innovative Tools and Techniques: Elevating Your Craft

In the world of pastry, new tools and techniques are constantly emerging. From silicone molds for intricate chocolate shells to laser-cut stencils for dusting designs, staying abreast of the latest innovations can offer new avenues for creativity and efficiency in your baking.

Learning from Mistakes: The Path to Perfection

Every baker has faced a batch of less-than-perfect shells, but these moments are invaluable learning opportunities. Whether it’s a dough that didn’t quite come together or a filling that overflowed, each mistake teaches you more about the delicate balance of baking. Embrace these lessons as stepping stones to mastery.

Sharing the Sweetness: Community and Collaboration

Baking is not just about the final product; it’s also about the joy of sharing and collaboration. Whether it’s swapping recipes with fellow bakers, contributing to a community bake sale, or teaching a friend your favorite techniques, the communal aspect of baking adds a layer of richness and connection to the craft.

As you continue your journey through the sweet and versatile world of dessert shells, remember that each step, from choosing your ingredients to the final sprinkle of sugar, is an opportunity to infuse your creations with love, creativity, and a touch of magic. Happy baking!